Hunting · Gear
Camera Belt Clips for Hunters – Field Mounting Options
A camera on your belt sounds simple until you’re trying to draw a bow without snagging it, or reaching for a rifle at a moment’s notice. Camera belt clips solve the hands-free problem, but not all of them account for the realities of hunting gear and movement through cover. The wrong clip turns a useful piece of kit into an annoyance you leave in the truck.
Here’s what matters when choosing camera belt clips hunters actually use in the field, and how to set them up so they work when you need them.
What Is a Camera Belt Clip and Why Hunters Need One
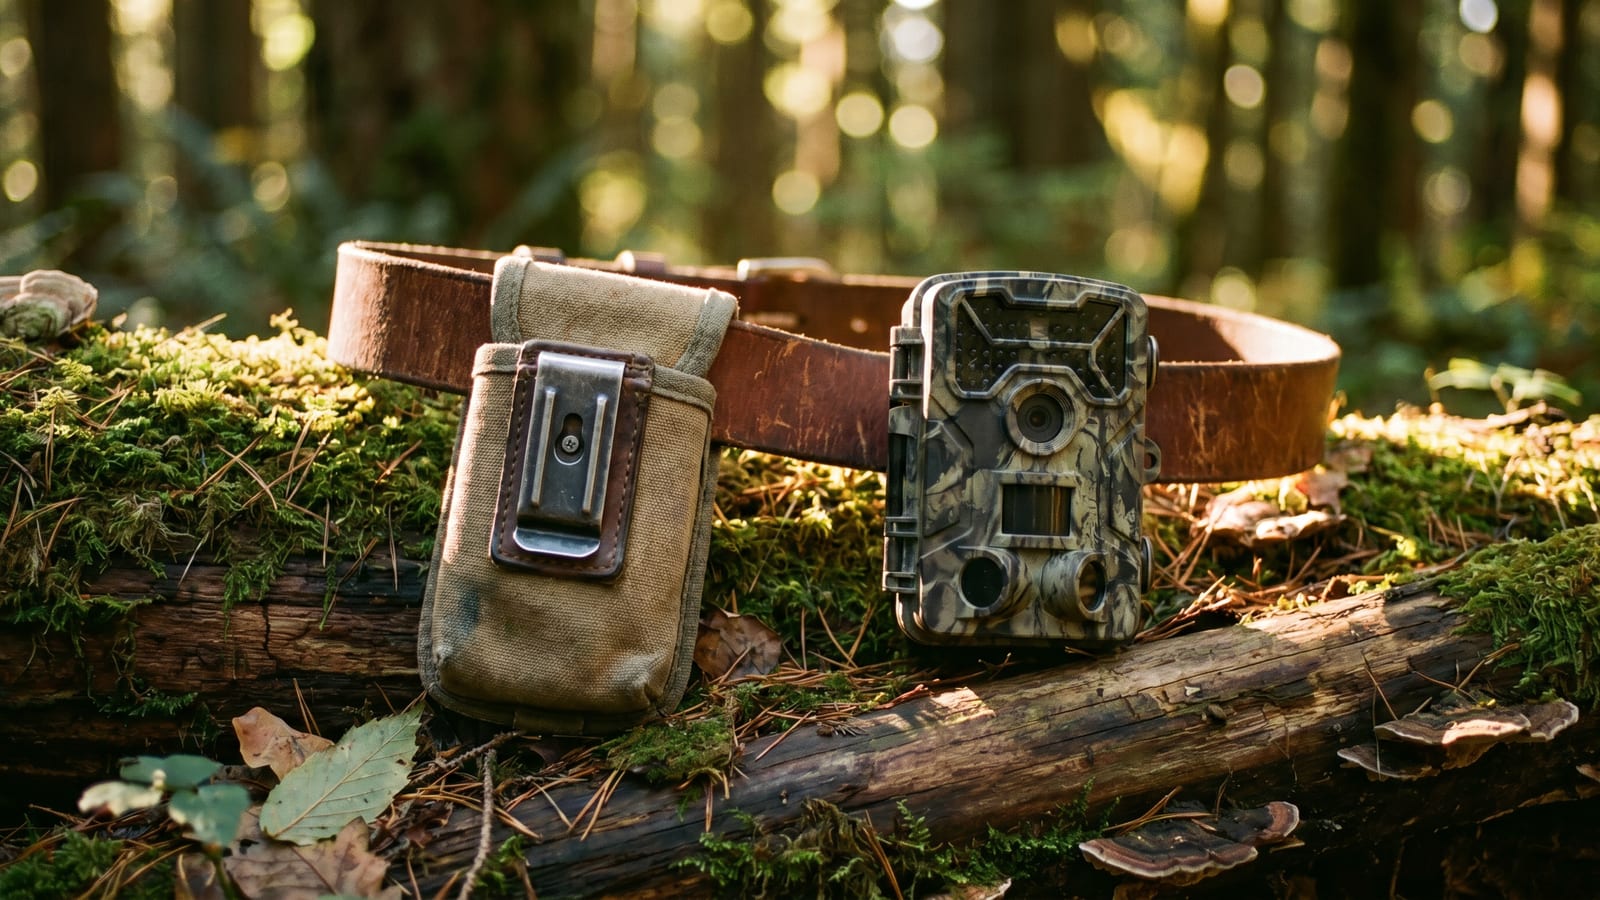
A camera belt clip is a mounting system that attaches a camera to your waistbelt or belt, keeping it accessible without occupying your hands. Unlike chest mounts or harness systems, a belt position puts the camera at roughly hip level, which changes your perspective and your freedom of movement.
Hunters use belt clips for three main reasons. First, you need both hands free for weapon handling, whether that’s a rifle, bow, or crossbow. A chest mount gets in the way of a rifle stock. A belt clip doesn’t. Second, hip-level mounting captures a different angle than head-mounted or chest-mounted options. It picks up weapon handling, hand movements, and the ground-level view of your surroundings. Third, a belt clip keeps the camera out of your face during long sits. Chest rigs shift and bounce. Head straps get uncomfortable after an hour. A well-positioned belt clip disappears.
The tradeoff is that belt-mounted cameras are harder to activate quickly compared to chest or head mounts. If you want to capture spontaneous moments in the field, that latency matters.
Types of Camera Belt Clip Mounts
Not all mounting systems are built for the same use cases. Here’s what you’ll find.
Hard mount clips are the simplest option. The camera slides or clicks into a fixed bracket on your belt. It’s secure and solid, but you have to draw the camera out of the bracket and re-holster it when you’re done. These work best when you know you’ll be filming a specific sequence (say, a filmed hunt or a guided hunt where you want documentation) rather than running-and-gunning throughout the day.
Quick-release clips solve the draw speed problem. These use a tab, lever, or quarter-turn mechanism that lets you pull the camera free with one hand and snap it back just as fast. Some use a Picatinny-style rail attachment; others use a proprietary quick-release plate. The better ones lock positively and don’t rattle loose over a full day of walking.
Loop-style belt mounts feed through a dedicated belt loop or MOLLE webbing slot. These sit more securely than clip-on designs and distribute weight better against your hip. The tradeoff is they require installation before you head out, and swapping cameras takes longer. Loop mounts are the better choice for hunters who run the camera all day as part of their kit rather than pulling it out for specific moments.
Universal clip-on mounts work with any belt up to a certain width. They’re convenient for switching between belts or loaning the setup to someone else. The compromise is fit. A clip that works on a 1.5-inch casual belt may not sit right on a 2-inch webbing belt, and a loose fit means the camera shifts and bounces with every step.
Key Features to Evaluate
Retention security matters more in hunting than anywhere else. You will bump things. Branches, rifle stocks, bow cams, the ground when you sit down hard. The clip needs to hold the camera through contact without accidental release. Test any clip by holstering an unloaded camera and working through your actual movement patterns before you trust it in the field.
Weather resistance is non-negotiable for hunting. Most trail cameras and action cameras handle light rain, but the clip mechanism is exposed. Look for metal hardware or reinforced polymer over cheap plastic. If you’re hunting in wet conditions regularly, a sealed quick-release system is worth the extra cost.
Noise management sounds minor until you’ve clicked a cheap plastic clip open and closed forty times in a morning blind. Metal-on-metal contact announces every movement to every animal within earshot. Quiet operation is a real feature. Look for clips with polymer contact points or rubberized coatings on the release mechanism.
Handedness and draw side are worth thinking through before you buy. If you’re right-handed with a rifle, the camera typically goes on your left hip so you can draw it with your dominant hand while keeping your rifle hand on the stock. If you’re a bowhunter, the calculation changes. You need the camera out of the way of your bow hand and string path. Left-side carry for right-handed shooters is the most common starting point, but your carry setup and dominant hand patterns might push you somewhere else.
Compatibility is where a lot of buyers get burned. Check the actual mounting spec before you commit. Some clips are keyed to specific camera models. Others use a universal cold shoe or GoPro-style thumbscrew pattern. If you’re running a trail camera on a housing, the attachment point might be completely different than what a clip-on mount expects.
Left Side vs. Right Side: Placement Matters
Camera placement affects your weapon handling, and in hunting that matters. Placement on the wrong side turns a useful tool into an obstacle you have to work around.
For rifle hunters, left-side carry (right hip) works well in most situations. Your right hand stays on the rifle. Your left hand pulls the camera, operates it, and returns it. The camera clears the stock when you shoulder the rifle. For left-handed shooters, mirror this.
For bowhunters, the calculation is tighter. Your bow hand and arm operate close to your body on the dominant side. A camera on that same hip interferes with the draw, the string path, or your grip. Most bow hunters who run cameras put them on the opposite hip or mount them on a chest strap that clears the bow entirely. If you’re running a release aid, that pushes even more gear to one side of your body.
For crossbow hunters, belt placement is generally a bad idea. Crossbows have a relatively narrow foot stirrup and a broad stock. A hip-mounted camera either gets in the way during cocking or positioning, or it sits so far forward that it’s useless. Chest mounts or bow-mounted Picatinny camera platforms make more sense for crossbow hunters.
Camera Belt Clips for Specific Hunting Situations
Tree stand hunting favors quick-release clips on the non-dominant side. You’re seated most of the time, so the camera sits at a good angle relative to your body and the area below. A long hunting session means you want easy, quiet access. The confined space also means you don’t want a bulky rig. A compact action camera with a minimal clip is better than a larger mirrorless setup.
Ground blinds and layout blinds are where belt clips genuinely shine. Movement is limited by the blind walls. You don’t want to lift a camera to eye level and block your shooting lanes. A hip-mounted camera pointing through the mesh or screen gap captures the interaction without interfering with your setup. Quick-release is still the call here because you may need the camera fast when something happens outside the blind.
Spot-and-stalk and mountain hunting push belt clips toward their limits. If you’re moving fast and covering ground, a belt-mounted camera bounces and shifts more than a chest mount. For long hikes to distant spots, a chest rig or harness system is more stable. For the final stalk when you want minimal kit, a lightweight quick-release clip on a simple belt attachment earns its place.
Waterfowl hunting adds the waterproofing requirement. Most dedicated waterfowl hunters run camera systems on chest straps or hat mounts because they stay dry in a layout blind. A belt clip works for open-boat or standing-water setups where the camera stays above waterline, but the wet environment accelerates corrosion on metal hardware. Rinse your setup after every hunt and check the clip mechanism for debris.
The Bottom Line
For most rifle hunters, a quick-release Picatinny or loop-style clip on the non-shooting side (left hip for right-handers) is the right call. It clears your dominant hand and weapon handling, stays out of the way during shouldering, and gives you access without taking your eyes off the field.
For bowhunters, rethink the belt clip entirely. Put the camera on the opposite hip from your bow hand, or use a chest mount that doesn’t interfere with the draw. The belt clip that works perfectly for rifle hunting will fight your bow setup if you don’t plan around it.
Before you get to camp, practice the draw and reholster a few times. Figure out which hand you reach for it with, whether it rattles when you walk, and whether it survives a simulated fall with gear. The camera that stays in the truck is useless. The one you discover doesn’t release cleanly when you need it most is worse.
Mount it right, practice the draw, and you’ll have it when you need it.