Outdoor Skills
How to Build a Survival Kit That Actually Works
You’re an hour into a day hike when the weather turns hard. You took a wrong turn on a forest road and your car is stuck at dusk. Your vehicle breaks down on a stretch of highway with no cell signal. None of these are dramatic scenarios. They happen to ordinary people every year, and survival kit building isn’t about paranoia. It’s about being the person who handles it calmly instead of the one who doesn’t.
What a Survival Kit Actually Is
A survival kit is a compact collection of tools and supplies designed to keep you alive and functioning when things go sideways. The key word is “compact” - this is field-portable gear, not a bunker. FEMA recommends a 72-hour baseline for emergency preparedness, which is a reasonable floor. But a well-built survival kit covers you across a much wider range of scenarios: a night stuck in the wilderness, a car stranded in winter, a power outage that stretches past a few hours.
You need one because the alternative is improvising with nothing. And improvising with nothing is a lot harder than it sounds.
The Core Categories Every Kit Needs
Start by thinking in categories, not individual items. Every scenario you’ll face in the field or on the road falls into roughly the same six buckets. Get these right and you’re covered for most situations.
Shelter and Warmth Your body loses heat faster than almost any other emergency unfolds. Hypothermia is a year-round risk in most of the country, not just winter.
- Emergency mylar blanket (space blanket) - takes up almost no space
- Lightweight tarp or bivy sack for more serious field use
- Extra base layer or wool hat if the kit is larger
Fire-Starting Fire means warmth, a signal, a way to purify water, and a psychological boost when things are bad. Always carry two methods.
- Bic lighter (reliable, cheap, works wet if you dry the striker)
- Waterproof matches or a ferro rod as backup
- Tinder - wax-coated cotton balls work well, and you can make them at home for almost nothing
Water and Purification You can go weeks without food. Water is the emergency. Don’t bank on finding clean sources.
- Water purification tablets (iodine or chlorine dioxide)
- Portable filter like a Sawyer Squeeze or LifeStraw for extended situations
- Collapsible water bottle or hydration bladder
Signaling Being found is often more important than surviving the night. Signal gear gets overlooked constantly.
- Whistle - a Fox 40 or similar pealess design carries farther than your voice and uses no energy
- Signal mirror - works in daylight and can be seen for miles
- Small flashlight or headlamp with spare batteries
First Aid Not a full trauma kit - that’s its own separate topic. Your survival kit first aid should cover the most common field injuries.
- Adhesive bandages in multiple sizes
- Gauze pads and medical tape
- Antiseptic wipes
- Moleskin for blisters
- Ibuprofen and any personal medications
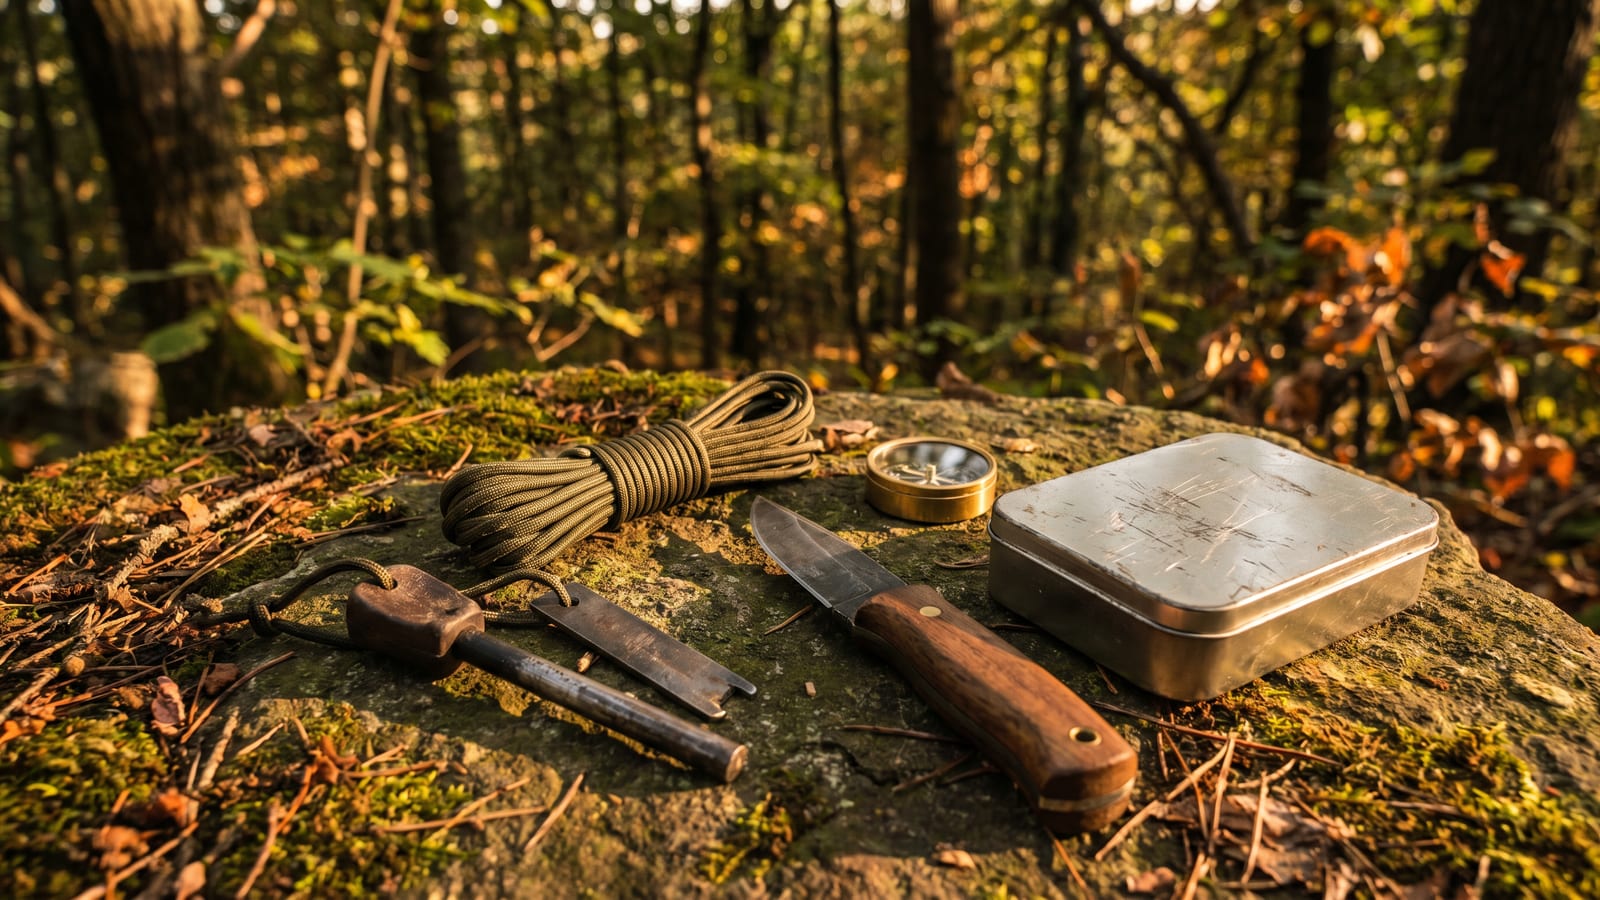
Tools and Cordage These are your force multipliers. A good knife handles more tasks than almost anything else in the kit.
- Fixed-blade or locking folding knife
- Paracord (50 feet minimum - it’s light and you’ll find a dozen uses for it)
- Duct tape (wrap a few feet around a water bottle to save space)
- Multi-tool for the vehicle kit especially
Choosing a Container
Most guides skip this entirely and go straight to the gear list. That’s backwards. The container shapes how you build the kit, how you pack it, and whether the contents survive wet conditions.
Your three main options are a stuff sack, a dry bag, and a hard case.
Stuff sacks are lightweight and packable, which makes them ideal when the survival kit is living inside a daypack alongside other gear. The downside is zero water resistance and no structure. Things shift around and you end up digging for the item you need most. Use a stuff sack only when the rest of your pack is already waterproofed and organized.
Dry bags are the best all-around choice for a field kit. Roll-top closures keep water out reliably, and a 5-10 liter size holds a complete kit without becoming a burden. They compress well, they float, and they’re cheap. A decent one runs $15-$25. This is where most people should start.
Hard cases (think Pelican-style boxes) are the right call for vehicle kits and home base kits. They protect gear from crushing, keep everything organized, and a gasket-sealed case keeps moisture completely out. Heavy and not backpackable, but in a truck or a closet at home those aren’t problems.
Whatever you choose: waterproofing matters. Even inside a dry bag, keep critical items like fire-starting and first aid in individual zip-lock bags. Water finds its way in eventually.
Building Your Kit in Layers
The biggest mistake people make with survival kit building is trying to build the full kit first. You spend $200 on a setup you don’t understand, it sits in the garage, and when you actually need it you’re not sure what’s in there or how anything works. Build in layers instead.
Layer 1 - The $30-$50 Starter
This covers you for the most common scenarios: unexpected overnight, car breakdown, getting briefly lost on a trail. You’re not planning for a week in the backcountry. You’re planning for the bad afternoon.
- Emergency mylar blanket
- Bic lighter and waterproof matches
- Water purification tablets
- Pealess whistle
- Basic first aid supplies (bandages, antiseptic, tape)
- Small fixed-blade knife or multi-tool
- 25-50 feet of paracord
- Headlamp with spare AAA batteries
- Dry bag or zip-lock bags to hold it all
That’s a real kit. Total cost from REI, Amazon, or a local outdoors store: $30-$50, depending on what you already own.
Layer 2 - Expanded Capability ($75-$150 total)
Once you’ve used the Layer 1 kit a few times and you know what you’re doing, add redundancy and depth.
- Upgrade lighter to a quality ferro rod for longevity and wet-weather reliability
- Add a Sawyer Squeeze or similar filter alongside the tablets
- Upgrade first aid to include moleskin, gauze rolls, SAM splint, and a small CPR mask
- Signal mirror
- Larger tarp or bivy sack
- Second dry bag to segment the kit (fire-starting always separate from everything else)
- Emergency food (a few Clif bars or similar - 1,200 calories minimum)
Layer 3 - Full Wilderness Readiness ($200-$300 total)
This is the complete wilderness survival kit. Appropriate for backcountry trips, extended travel in remote areas, or a home emergency kit that needs to cover multiple people for 72 hours.
- Everything from Layers 1 and 2
- Quality fixed-blade knife (Mora Garberg or similar)
- Full 50-foot paracord plus additional 100-foot bank line
- Portable camp stove and fuel canister
- Comprehensive first aid kit with trauma supplies
- Compass and paper topo map of the area
- Personal locator beacon (PLB) or satellite communicator like a Garmin inReach Mini
- Three days of emergency food rations per person
Build your own. Every time.
Pre-made survival kits are tempting. They’re packaged nicely, they check a lot of boxes, and you can grab one on Amazon for $40. The problem is that manufacturers cut corners on precisely the things you’ll need most. The knife is stamped metal. The fire-starter is a novelty. The first aid supplies are Band-Aids from a dollar store. You get a box that looks complete but performs badly under pressure.
When you build your own kit, you know every item in it. You chose it. You know how it works. That knowledge is part of the kit.
Organizing for Real-World Use
How you pack the kit is almost as important as what’s in it. Organize by priority of access, not by category.
The items you’ll reach for first - headlamp, whistle, fire-starting kit - should be on top or in an exterior pocket. Your backup water filter and extra cordage can sit at the bottom. If you’re digging through everything to find a lighter when it’s getting dark and raining, your kit failed you before you even opened it.
Within the container, use small zip-lock bags to group items and add a layer of water resistance. Label them with a marker if you’re detail-oriented, or just learn where things live through practice.
Two fire-starting methods minimum, always separated. If one gets wet or fails, you pull the other. Not paranoia - basic redundancy. Apply the same logic to water purification: tablets and a filter. Light sources: primary headlamp and a backup.
One of the best habits you can build: keep two kits. One stays sealed, fully stocked, untouched. That’s your real emergency kit. The second is your practice kit. Use it on weekend trips, day hikes, camping. Learn the knife, use the filter, run the ferro rod until you can get a spark every time. When you have to open the real kit, you’ll know exactly what you’re doing.
Maintenance and Expiration Checks
A survival kit isn’t a one-time project. It’s a system you maintain. Built-and-forgotten kits have dead batteries, expired medications, and water tablets that have been sitting open for three years.
Check your kit twice a year. The easiest schedule: the two daylight saving time changes in spring and fall. You’re already changing smoke detector batteries - do the kit at the same time.
What to check each time:
- Batteries - replace on a schedule rather than waiting for them to fail
- Medications and first aid supplies - anything with an expiration date gets checked and swapped
- Food rations - rotate them out and eat what’s expiring; replace it fresh
- Knife edge - sharpen it if it needs it
- Fire-starting gear - make sure the lighter still has fuel, matches aren’t damp, ferro rod is serviceable
- Clothing layers - if you added a spare jacket to the vehicle kit, make sure it still fits the season
The check takes 20 minutes. It’s the difference between a kit that works and a kit that looked good two years ago.
Vehicle, Home, and Daypack Variants
One kit doesn’t cover every context. The gear stays mostly consistent; what changes is scale, weight tolerance, and the scenarios you’re actually planning for.
Vehicle Kit
Your car kit lives in the trunk or cargo area, so weight isn’t the constraint - bulk and coverage are. Add roadside-specific items to your standard survival kit:
- Road flares or LED emergency triangles
- Jumper cables or a jump starter battery pack
- Spare tire and the tools to use them
- Extra water (a gallon for the radiator, separate from your drinking supply)
- Work gloves and a reflective vest
A vehicle kit can be heavier and more comprehensive than anything you’d carry on foot. Take advantage of that.
Home Kit
The home emergency kit is a different animal. Think 72 hours without power, water, or outside help - which is exactly the FEMA planning baseline, and it’s a reasonable target.
- Water storage: one gallon per person per day, minimum three days
- Non-perishable food for the household
- Copies of important documents (IDs, insurance, medications list) in a waterproof envelope
- Full prescription supply plus OTC medications
- Larger first aid kit with a manual
- Cash in small bills (ATMs don’t work in power outages)
- Battery-powered or hand-crank radio
Daypack / Field Kit
When you’re on foot and the kit is going in your pack, weight is everything. Keep it under five pounds - ideally closer to two for a day kit. Cut ruthlessly. Everything here needs to earn its weight.
The daypack kit prioritizes fire-starting and water above everything else, because those are your two most time-sensitive needs in the field. Skip the heavy multi-tool and bring just the knife. Skip the full first aid kit and bring a focused blister and wound kit.
One clarification worth making: bug-out bags, survival kits, and emergency kits overlap but they’re not the same thing. A bug-out bag is built for leaving home fast - several days of supplies, goes where you go. A home emergency kit is stationary, larger, designed to shelter in place. A survival kit is field-portable and scenario-specific. You might eventually own all three. Start with whichever fits your most likely real-world situation, and build from there.
The goal isn’t a perfect kit. The goal is a real one - stocked, organized, maintained, and understood. That’s what actually gets you through a bad day.